

If you’ve read my six-day budget itinerary for Norway, you’ll know that the primary reason I travelled to Norway in the first place was to complete the famous one-day hike to Trolltunga.
Much like a lot of people I’m sure, it was a photo similar to this one that persuaded me to add the Trolltunga hike to my travel hit list.
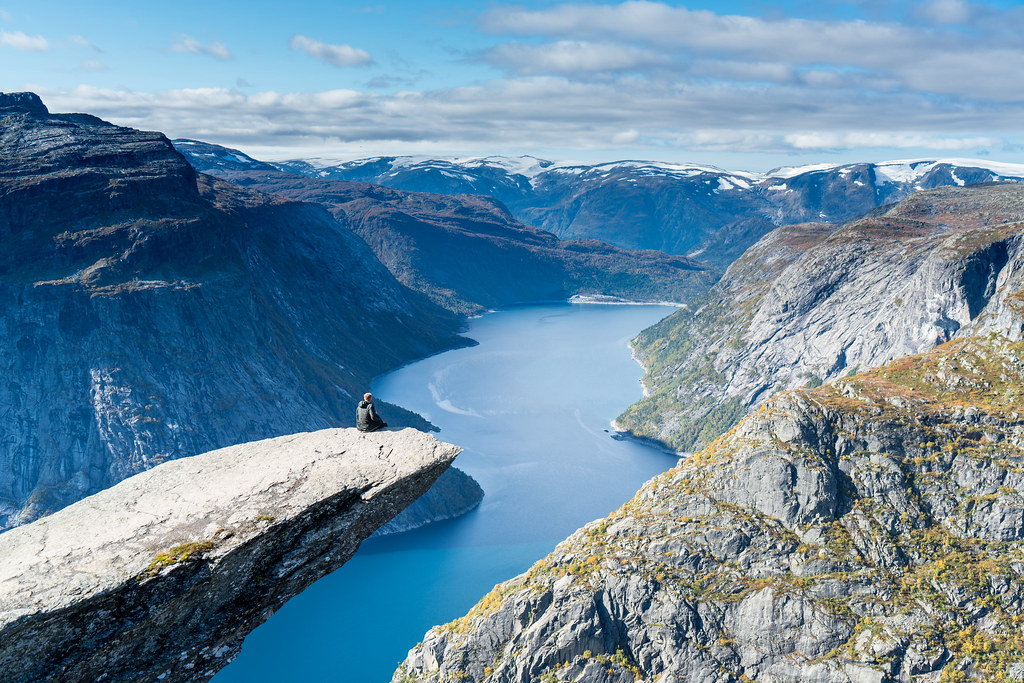
Photo by Dan Kristiansen via Flickr’s Creative Commons licence
Trolltunga (meaning “Troll’s Tongue”) is the name of that rock in the photo above. It juts out into an airy void some 700 metres above Ringedalsvatnet lake. It’s one of Norways most recognisable landmarks.
The hike to Trolltunga is a 28 kilometre round-trip (there’s only one way up and down) that sees you ascending almost 900 metres – which, granted, is a lot but pales into insignificance when compared to the massive 1400 metre ascent we made on day two of our Mount Toubkal trek.
It’s a challenging hike but one that rewards you with some spectacular views (once the sun has risen and you can actually see them!) along the trail, of rugged and remote landscapes that are reminiscent of Iceland in parts.
Some of the links in this post are affiliate links. All this means is that if you make a purchase through one of the links I have provided, I will earn a small commission as a result but the cost to you will remain exactly the same.
Where is Trolltunga?
Trolltunga is located at the western edge of the Hardangervidda plateau, in a remote part (because isn’t that where all the best hikes are located?) of southwestern Norway, approximately 160 kilometres east of Bergen.
Most people who plan to complete the hike to Trolltunga factor in an overnight stay in Odda – a post-industrial town in an absolutely stunning setting at one end of the Sørfjorden fjord. The Trolltunga trailhead at Skjeggedal is just 13 kilometres (or a 20-minute taxi ride) from Odda.
How do I get to Trolltunga?
First of all you’ll need to get to Odda.
- From Oslo you can make the journey by bus, changing in Seljestad vektstasjon. The whole journey takes around eight hours. You’ll need to check Nor-Way Bussekspress and Skyss timetables for details.
- From Bergen you can also make the journey by bus. It’s a little complicated to book, as only two departures per day are actually direct (i.e you can stay on the bus for the entire journey), and the indirect ones are a lot more expensive, because they involve a boat trip on a passenger ferry across the fjords. At the ticket machine at Bergen’s Bus Station, choose the ticket that reads “via A – D + F + ferje Tor-Jon” for 137 NOK (correct August 2018). It takes approximately three hours. Again, you can view timetables at Skyss.
From Odda the options are to catch a bus or taxi.
- Shuttle buses between Odda and the trailhead at Skjeggedal are operated by two companies – Odda Taxi and Taxi/Bus Odda. You can either click on the corresponding links for more info or view the timetables for both companies here. The price of a return ticket is 230-250 NOK (correct August 2019).
- The price we were quoted for a taxi one-way was 400 NOK. Due to having to postpone our hike by one day, we then had to catch the bus back to Bergen on the same day we were hiking. This meant having to be back in Odda, at the bus station, with all our stuff by 5 p.m. As a result, we would have been cutting it fine if we caught the earliest shuttle to the trailhead. So we booked a taxi. Our kind host at our Airbnb arranged it for us, and managed to find two other hikers who wanted to share it with us, so it ended up costing us only 100 NOK each.
What is the best time of year to make the hike to Trolltunga?
The recommended season to make the hike is from the beginning of June until the end of September. Outside of these times it is still possible to make the hike to Trolltunga, but it is not recommended without a guide.
It is important to note that weather conditions on the trail can be poor even in Summer. Make sure you are following Trolltunga Trail Information on Facebook and check the updates daily. We hiked at the end of August (i.e within the recommended hiking season), but we still had to postpone our hike by one day due to severe weather conditions. It looks like they were experiencing similar conditions at the end of August this year:

How fit do I need to be to attempt the hike to Trolltunga?
Although the hike to Trolltunga is graded as challenging/demanding, it’s not a technically difficult climb. The difficulty stems from the fact that it’s a very long hike (unless you camp, you have to make the climb and the descent in one day and there’s only one way up and down!) and there are a lot of very gruelling and relentless uphill sections during the initial part of the climb.
You’ll need to have a reasonable level of fitness, but a positive mental attitude is just as important in my opinion.
How long do I need to allow to make the hike to Trolltunga?
This is dependent upon so many different factors – how fit you are, how quickly you walk, how many stops you make, what time of day you’re hiking, the conditions on the trail, the time of year, how long you spend queuing for photographs at the top, and whether you get lost (although I’ll admit that this is quite difficult to do; the trail is well signposted all the way).
Jayne and I are reasonably fit. We’re both runners and members of our local gyms and generally lead a fairly active lifestyle, but we’d read multiple accounts online from people who sounded as though they possessed a similar level of fitness and the recommended time for completion varied from eight hours to twelve. So, bearing in mind that we weren’t classing it as a race and we did actually want to make a fair few photo stops along the way but that we weren’t planning on having a full-on sit-down breakfast picnic on route, we anticipated that it would take us somewhere around ten.
In my opinion, the largest factor determining how long the hike will take you is how long you spend queuing for photos at the top. And this in turn is determined by what time of day you arrive at the top which in turn is determined by what time of day you start the hike. We arrived at the top at around 8:30 a.m and had to wait approximately 40 minutes each. I stood at the top poised with my camera while Jayne queued and then we swapped over. Ideally we would’ve loved a photo of the two of us on the rock, but logistically that wasn’t possible due to the queuing factor. I guess that’s one of the benefits of booking a guide.
What should I pack for the hike to Trolltunga?
Fortunately we’d done our research beforehand so were somewhat prepared, but I still could not believe just how cold it was up at the top – in the middle of Summer! It wasn’t so bad when we were walking but when we were standing in the photo queue at Trolltunga itself, we were wearing all the layers we’d packed, as well as our woolly hats, scarves and gloves and we just couldn’t keep warm. I’m surprised I could actually operate the shutter button on my camera, to be completely honest. Do not underestimate the bitterness of the wind up there!
To give you an idea of what you’ll need, here’s what I wore/packed on the hike to Trolltunga:
- Hiking shoes. I did contemplate packing hiking boots for the ankle support, but because the hike to Trolltunga was part of a longer trip around Norway and I was only travelling with hand luggage, I opted for walking shoes instead. And in retrospect it was the right choice – for me. I completed the hike to Trolltunga in my Merrell Siren hiking shoes. I think Merrell make fantastic walking shoes that really stand the test of time. If you’re making the hike outside of the Summer months, I would suggest that hiking boots may be a better option though.
- Long sleeve base layer. You’ll need something lightweight and quick-drying but something that will also keep you warm.
- Fleece. I love this one by Rab for the colour (I’ve got it in seaglass), zipped pockets, thumbholes and hood.
- Leggings or walking trousers, depending on your preference. I find leggings offer greater freedom of movement.
- Waterproof jacket. I’ve got the Rab Downpour Jacket, which I absolutely love.
- Woolly hat that covers your ears sufficiently. Bart make some great ones.
- Scarf or thermal/merino wool buff.
- Warm gloves. I just took my fleece-lined mittens that I’ve owned for years but these thermal gloves apparently still allow you to operate your touchscreen on your phone whilst wearing them.
- Hiking socks. I have several pairs by Smartwool.
- Head torch. Because you will more than likely be completing the initial part of your climb in complete darkness. Petzl make comfortable, reliable head torches.
- A comfortable, well-fitting day-pack. Around a 20-litre capacity should be sufficient. I try not to pack too much because, well, I’ve got to carry it all. And my DSLR already weighs a ton. I love my Osprey Tempest.
- Waterproof backpack cover. Although we didn’t get any heavy rain, it still rained a fair bit of the time during the initial section of our hike to Trolltunga. I use this waterproof backpack cover by Outad.
- Snack/energy bars. Apart from a very early breakfast banana, we kind of forgot to eat anything until part the way through our descent, but I still felt a lot better for having a good supply of snacks available, had we needed them.
- A refillable water bottle. It’s quite safe to drink the water from the streams in Norway so just a plain old refillable water bottle will do, but in many countries you’d be safer with a water bottle that comes with its own filter.
- Proper food. You’ll be hiking for a period of time that’s longer than your normal working day, so you’ll need some sustenance beyond bananas and energy bars. We made ourselves some tuna sandwiches at our apartment the evening beforehand. Protein helps you to stay fit and healthy and is good for rebuilding muscle – so I believe!
- Blister plasters. Although you shouldn’t need them if you have comfortable, worn-in hiking shoes, it’s always best to carry some blister plasters – just in case!
What can I expect from the hike itself?
First of all, prepare yourself for a very early start! Our taxi was booked for 4 a.m and we arrived at the trailhead at just after 4:30 a.m. Considering that it was effectively the middle of the night and we’d not had a lot of sleep, we were feeling surprisingly energetic and full of excitement and anticipation for what lay ahead.
With head torches strapped to our heads and the hoods of our waterproof jackets pulled around our faces, we plodded along in the drizzly rain, hoping and praying that it didn’t get any heavier as the day progressed.
Now that I’m armed with the knowledge of just how relentless that initial uphill climb was (because we had to come back down the same way later that day), I’m actually really glad that we completed it in total darkness. It would’ve been so disheartening to have been able to see how much of the seemingly never-ending switchback we still had ahead of us. As it was, we simply concentrated on putting one foot in front of the other, ensuring that we weren’t falling too far behind the two girls we shared the taxi with, who had set off slightly ahead of us.
Other than those two girls we encountered very few people on the initial part of the trail. At the time, we hoped it was because we’d set off before everyone else and that we’d be two of the first people to the Troll’s Tongue. Sadly those were very naive thoughts – it appears that, regardless of time of day (or night), there are always other people on the trail. It’s true that numbers are significantly lower the earlier you make the climb, but because many people choose to camp on route (and wow, now that I’ve seen some of the locations people pitched up at, I wish I had, too), you will never be alone at Trolltunga.

The initial switchback climb actually continues for a whole 4.3 kilometres.
The single-lane road was built primarily for use by locals as a replacement for the old funicular system (you can still see the tracks on the photograph below), but can handle up to 30 extra cars per day. It finishes at Mågelitopp, where there is a small car park. So, yes it is possible to drive this part of the route, to shave approximately three hours off the hike and 400 metres off the ascent. However, there are limited parking spaces at the top and these have to be booked in advance for a fee of 600 NOK.

As you turn off the tarmac road to join the main part of the trail, the terrain levels out for a short while and although you do still have another 400-500 metres to climb, you don’t have to do it all in one go like you did at the start!
You can see a map of the trail below.

Photo credit: Fjord Norway
As I previously mentioned, the route is well marked along the way. There are signposts that point you in the right direction and give you the distance you have walked thus far and the latest time of day you should be passing that particular point in order to complete the hike safely.
However, if you miss these (although you’d have to be walking along with your eyes closed to do so) then you’ll also see painted red ‘T’ markings and cairns (mounds of rough stones) at regular intervals along the trail.

As you continue along the trail, the landscape changes into a remote and rocky wilderness incorporating creeks, streams, boulders, and mud puddles.
Even in August there was still plenty of snow sitting on the peaks of the surrounding mountains and a lot of moisture lingering in the air. Be prepared to get your feet wet at some point, and if you don’t, consider it a bonus.


Due to the fact that it didn’t get properly light until part the way through our climb and that, for that reason we needed to fully focus on the terrain underfoot, we didn’t snap too many photographs on the way up. We were also keen to make it to The Tongue as early as possible in order to avoid the long queues.
In fact, I think the first proper stop we made was here, because after seeing this view, how could we simply stroll on past without reaching for our cameras?


Once you pass this point, the vast majority of the uphill stretches are out of the way and you’ll follow that fjord we posed in front of all the way to Trolltunga.
According to my Fitbit (I’m aware these stats aren’t 100% accurate but I didn’t make a note of our departure and arrival times so this is all I have to go on), it took us 4 hours 10 minutes to make the hike to Trolltunga.

Can you tell it was raining at this point? 😉 My hands were so cold I couldn’t take the photo before the raindrops had attached themselves to my lens!
Initially it didn’t appear that there was much of a queue, but it quickly became clear that because The Tongue is at a lower level than the path you’re on when you arrive at it, the queue actually continues down the makeshift staircase and on to the rock below.
And everyone I encountered in the queue was respectful to all the other people who were patiently waiting their turn to get their photograph taken. No-one took the piss with regards to how long they posed for, and there wasn’t an Instagram girl in sight 😉
And the ‘ledge’ isn’t anywhere near as narrow and scary as it looks in the photos. Having said that though, you do need to take care. As cool as some ‘daring’ poses may look on the ‘gram, you need to still be alive to post them. An Australian girl lost her balance and fell to her death from Trolltunga in 2015.

Once we’d snapped our photos, we started our descent.
According to my Fitbit it took us 4 hours 16 minutes to get back down to the trailhead. I’m aware that most people make the descent in a faster time than the ascent but in our defense neither of us are downhill fans, and to be honest we weren’t in as much of a rush once we knew we had an ample amount of time to make it back in time for the shuttle bus we needed to catch.
Moreover, we made a lot more photo stops on the route back (most of the photos you see in this post were taken on our descent, because the lighting was so poor on the ascent). Our legs were also tired and we didn’t possess the same excited anticipation that we did on the way up. Oh, and we stopped to eat the tuna sandwiches we’d forgotten about on the way there.

We were kind of a bit gutted on the route down when the sun came out and we could see patches of blue sky behind the clouds, because we couldn’t help thinking about how much better the photos of us on the Troll’s Tongue would’ve looked had the sun been shining down on us.
But I think, having seen other bloggers’ photos at Trolltunga, that we would have been in a very small minority if we’d have been that lucky. As it was, I felt lucky enough to have finally completed the hike to Trolltunga in the first place. As we’d already had to postpone the hike by one day due to bad weather, we were well aware that there was a very real possibility we’d have to return home without even attempting the hike at all.
Where to stay in Odda
I cannot recommend our little Airbnb enough. Located in a residential area about a kilometre uphill from Odda’s bus station, it offered some wonderful views straight out of our bedroom window. Whilst the house itself was cosy and spotlessly clean, it was the hosts that were the best thing about where we stayed. We were blown away by their kindness and hospitality, and they couldn’t have done more to help us and make us feel at home.
Considering how expensive accommodation is in Norway, we thought that £150 for two nights (so, £75 per person) was an absolute steal.

If you like this article, please share it on social media using the share buttons at the top of the post. And if you’d like to save it for reading later, why not pin to one of your Pinterest boards? Alternatively you can follow along on Facebook or Twitter, or you can look me up on Instagram or Pinterest too!


13 Comments
I am stunned by the photographs. The landscape of Norway is breathtaking. This is the kind of hike I would love to embark upon.
I’ve been trying to get fitter so I can do more hiking when I travel, this one looks stunning, worth the effort
Definitely worth the effort but probably not the best one to try if you’re new to hiking, as it’s a pretty long one with some relentless uphill stretches!
I didn’t even know this place existed!! The picture from the top of Trolltunga is absolutely STUNNING! Was it a difficult hike? I have asthma and I have to be a tad careful with all the ups and downs!
It wasn’t technically difficult but it was ridiculously long (unless you camp, it’s 9-12 hours in one day) and pretty arduous – especially the initial uphill section.
Due to having to get back to Bergen the same day we hiked, we were really pushed for time too, but if you’re not, and if you can afford to pay for taxis to and from the trailhead, you have the flexibility to slow it down a little and take regular breaks 🙂
The hike to Trolltunga looks AMAZING! and WHAT A PAY OFF!! Such stunning views!
It was! So pleased we were able to make the hike in the end 🙂
We ran out of time for this hike on our fjord road trip while we were out there. Saving this for when we’re able to return. It looks gorgeous!
Aww, gutted 🙁 but a fjord road trip sounds amazing! What places did you have on your itinerary?
WOW! Those views are incredible! I was in Norway but we didn’t manage to do any hiking. I do remember how wild the weather was; definitely not something to embark on without a lot of preparation!!
Yes, that’s something I learnt very quickly: even in August, the weather still has the power to test you to your limits!
This hike is something I’ve wanted to do for so long, those views are absolutely amazing! This is definitely on my list for my next trip to Europe! 😁
This looks so amazing! I want to go to Bergen later this summer, or next year and I’ll definitely use this as a reference!